Position List
| Audience: | All users |
| Last Reviewed: | 27 January 2026 |
| Introduction: | This topic explains how to use the position list to track vessels and arrange deliveries |

The Position List gives a view of the current and planned destinations for vessels and any agents registered near the destination ports via use of an interactive map. Direct access to the Position list can also assist user with setting up the delivering of orders.

To access a vessel's Position List either:
- On the Purchasing screen, click the vessel's location near the top-right of the screen (it can be found beside this icon:
 )
) - Access the position list from the user's home page by clicking the expand
 icon.
icon.
-
Warehouse information or arranged deliveries cannot be viewed from the home page position list.
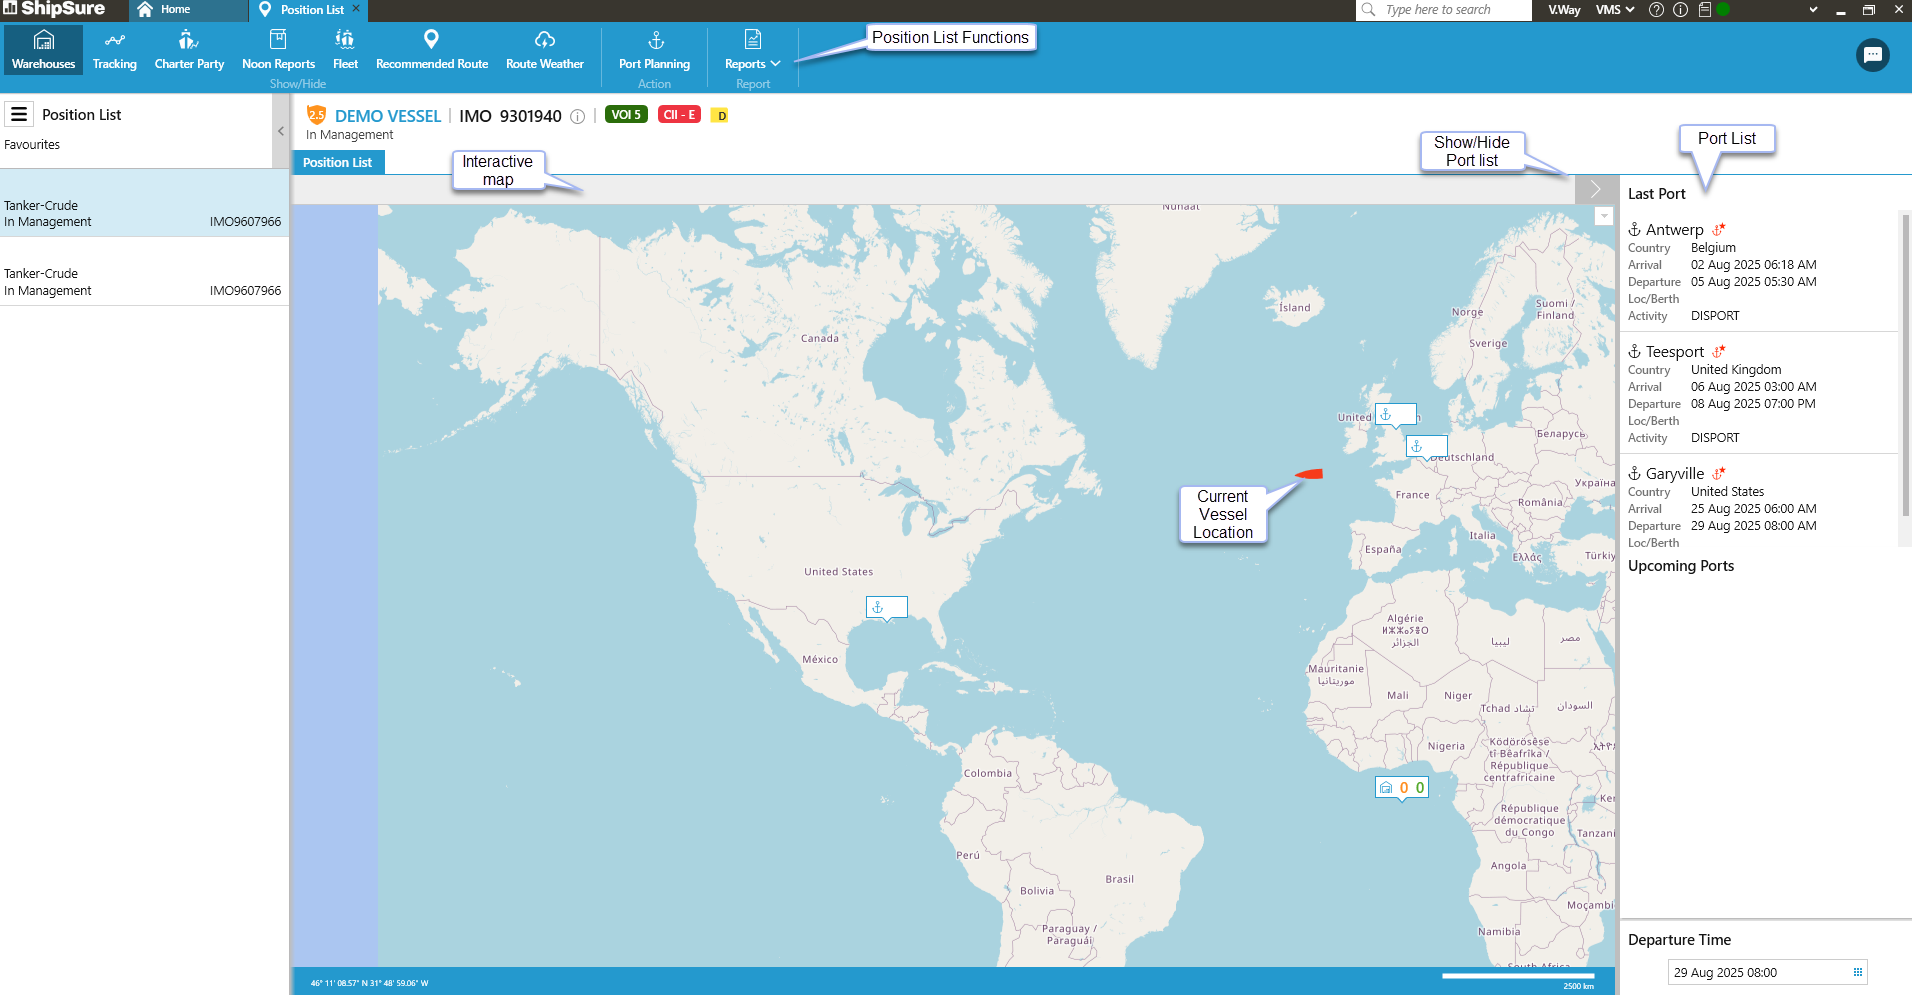
At the top-left of the screen, use the  show / hide icon to view or remove the Ports List.
- Warehouses: Appear on the map with this icon -
 . See Delivering orders to vessels below for more information.
 - Journey: A blue line will appear from the ship's previous port to its current location icon -
 .
.
View the position list of any vessel by typing its name (or part of its name), then press [Enter].
- If the ship has more than one word in its name, either search by its first name or use the wildcard symbol - % - in front of the search word to search anywhere in its title.
- For example, if searching for the ship "Amazon Warrior", enter AMAZON (or AMAZO, AMAZ etc.). Searching for "Warrior" would not find the ship - but entering "%Warrior" would.
- To hide the vessel search (and expand the map), click the
 icon.
icon.
- The vessel's current location is shown with this icon: .
- Each port in the vessel's itinerary will be shown, alongside its position in the itinerary:
 .
. - If the warehouses filter is turned on, the location of all the warehouses with orders for the vessel will be displayed:
-
To move round the map, hold down the left mouse button and drag the mouse . (The orange number shows orders currently being delivered to the warehouse, the green number orders that have been already been delivered). There is also the functionality to allow the user to choose to deliver the orders.
 - Zoom in / out of the map by using the mouse wheel (positioned between the left and right mouse buttons)
-
With the warehouses option turned on, view all the warehouses that have orders for the selected vessel (these are split into SW and DW). Clicking on the order number opens its details.

-
To deliver these orders:
- Highlight an order that is marked SW
 Responsible for arranging the purchase. Procurement Officers can also create requisitions, run local reports and check invoice accruals and release.
However, they cannot authorise any quotes or invoices. then Click [Deliver to Vessel].
Responsible for arranging the purchase. Procurement Officers can also create requisitions, run local reports and check invoice accruals and release.
However, they cannot authorise any quotes or invoices. then Click [Deliver to Vessel]. - This will open up the Create Freight Order screen, where the delivery information can be added.
-
Users can only arrange to deliver orders stored at the warehouse, not those currently being delivered there.
- Highlight an order that is marked SW
-
This section displays the vessel's current port, then the other ports in its itinerary, including arrival / departure information, berth (if known) and activity.
-
When any port in the list is selected:
- The map will highlight the location of the port.
- If any agents are present at the port, their contact details will be displayed.
- Click on the agent's email address to send an email from the email application on your PC (e.g. Microsoft Outlook).